Tiny11 is a lightweight stripped-down version of Windows 11 that can easily run on low-end PCs.
Windows 11 even though very popular may not be supported by your old or low-end PC and Laptops owing to its hardware limitations – TPM 2.0 and high RAM requirements.
But if you want to run Windows 11 on your old PC, you can download Tiny11 ISO. Some people also call it Windows 11 Lite.
A developer named NTDEV came up with a basic simplified version of Windows 11 called Tiny11. It is super lightweight, getting rid of all that extra stuff we usually don’t need. The best part is that it can run on just 2 GB RAM and 8 GB storage.
You will get the download link to Tiny11 below and then a tutorial to install the OS on our computer beyond in the later segment.
Table Of Contents
Download Tiny11 ISO
Here are the working links to download Tiny11 ISO to install on your PC which is safe and free. Click on the links and your download will begin
| Windows Version | Tiny11 NEW |
| Size | 4.2 GB |
| Version | 22H3 |
| Download Button | Download Tiny 11 ISO 22H3 |
| Windows Version | Tiny11 |
| Size | 3.6 GB |
| Version | 22H2 Beta 2 (no system requirement) |
| Download Button | Download Tiny 11 ISO |
| Windows Version | Tiny11 |
| Size | 3.0 GB |
| Version | 22H2 Beta 1 |
| Download Button | Download Tiny 11 ISO |
| Windows Version | Tiny11 |
| Size | 3.6 GB |
| Version | 22H2 Beta 2.1 |
| Download Button | Download Tiny 11 ISO |
| Windows Version | Tiny11 |
| Size | 4.0 GB |
| Version | 22H2 R2 |
| Download Button | Download Tiny 11 ISO |
Tiny11 OS Requirements
| RAM | 2 GB |
| Space | 8 GB |
| Secure boot and TPM 2.0 | Not Required |
| Processor | Dual Core |
Install Tiny11 from ISO
A. Make Tiny11 bootable from ISO
Now that you have downloaded the Tiny11 ISO, its time we create a bootable from it, in order to install it.
You can use your flash drive or even a DVD but the former is comparatively faster.
Here we will use Rufus, a free tool to create Tiny11 bootable USB in no time. It even has an in-built option to bypass TPM 2.0 but we don’t need it with this OS.
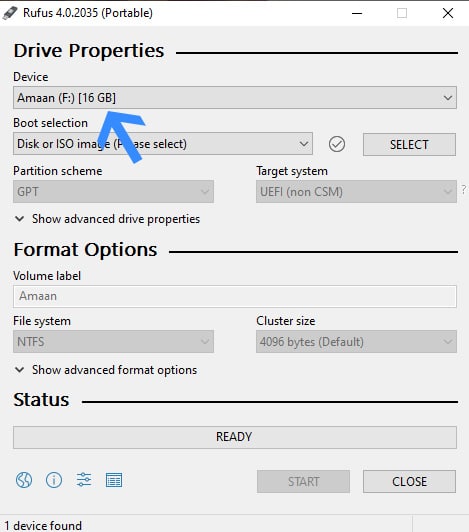
- Plug in your flash drive (with 8GB or more space) and then launch Rufus on your computer.
- Select the flash drive from the drive menu. If you have multiple flash drives plugged in then you will need to select it.
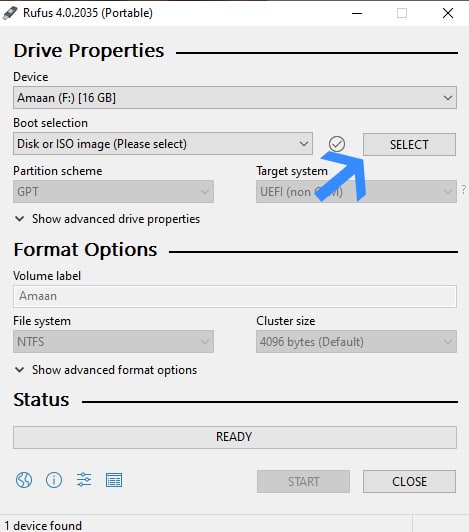
And if you only have a single drive plugged in, then you can leave it after ensuring that the correct one is selected. - Then click select and locate your Tiny11 ISO file for creating the bootable drive. The ISO file’s name will appear in the boot selection menu.
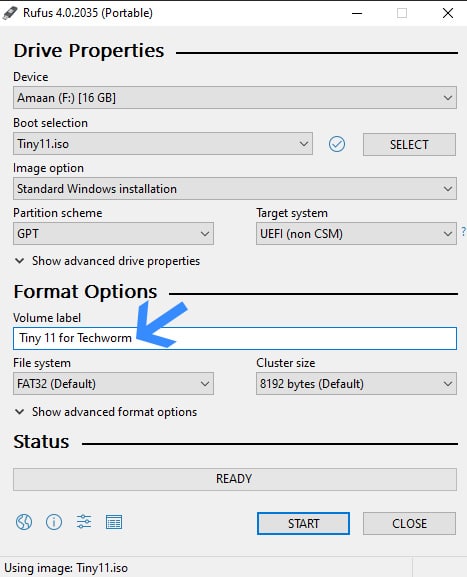
- Next up, head to the volume label and give a name to your flash drive. You can name it anything under the Sun.
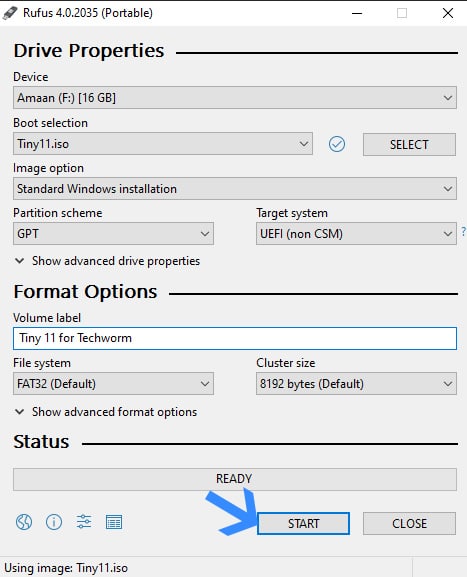
- Now click Start and wait for a couple of minutes before the process gets completed. You will get a success prompt once the process is successfully completed.
B. Install Tiny11 OS from ISO
In the last section, we created a Tiny11 bootable, now it is time to install it on your computer.
Press Pause – If you want to create a partition for Tiny11 then follow our tutorial on creating a partition in Windows.
And in order to do that, you need to select the Tiny11 bootable drive while your computer boots up. You have to press the boot menu key, which varies on different computers.
We have listed the shortcuts for leading brands. They may vary with time but most will remain the same.
Laptops
| Brand | Boot Menu Key |
| ASUS | F8 |
| Acer | F12 |
| Dell | F12 |
| HP | F9 |
| Lenovo | F8, F10, F12 |
Desktops
| Motherboard Brand | Boot Menu Key |
| ASUS | F8 |
| Gigabyte | F12 |
| MSI | F11 |
| Intel | F10 |
| ASRock | F8, F11 |
| Biostar | F9 |
- Restart your computer and then select your Tiny11 bootable drive using the boot menu key.
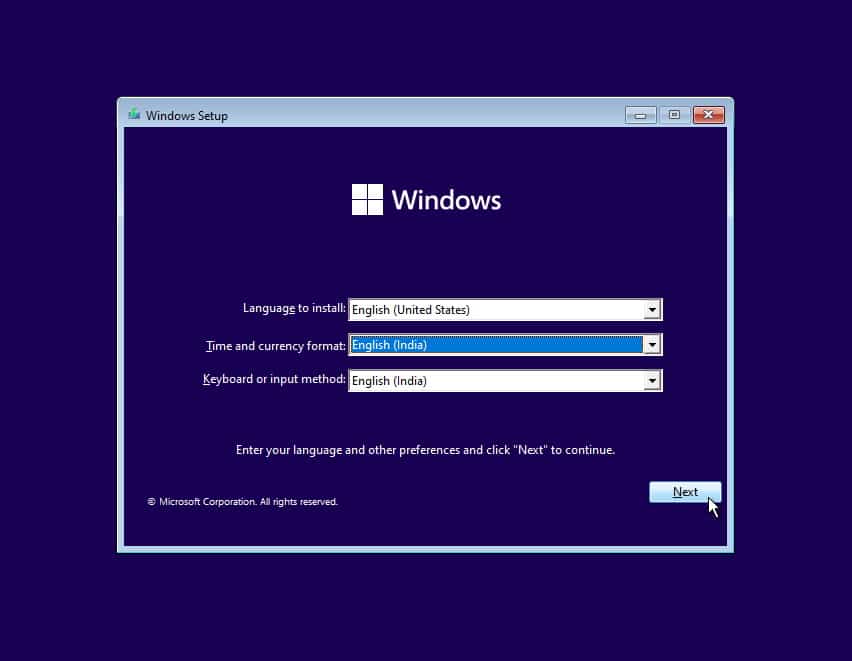
It will take a couple of seconds to a minute for the files to get loaded so be patient. - Once the Windows setup has loaded, select the language, time and currency format, and the keyboard language.
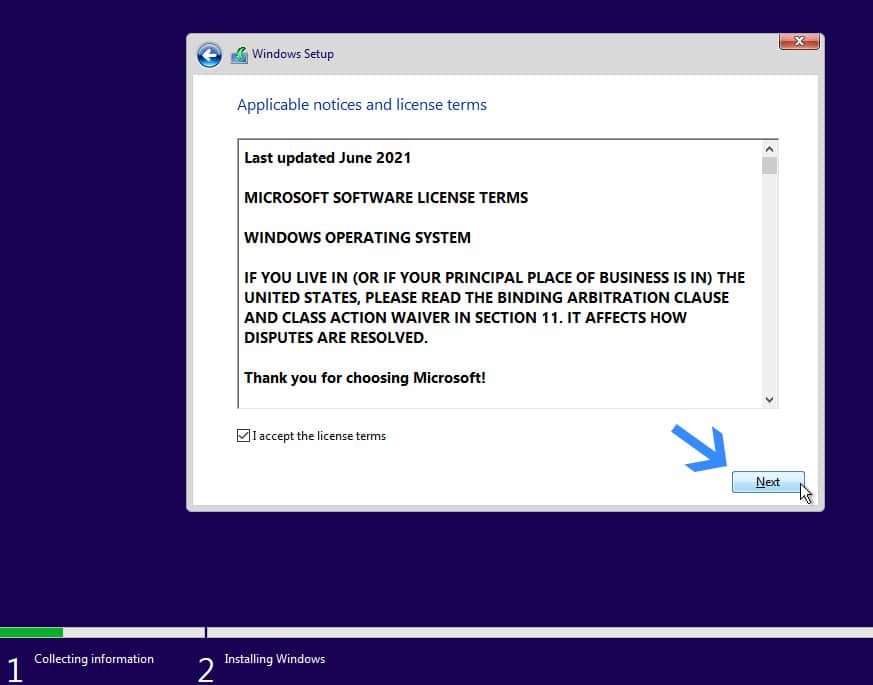
- Tick I accept the license terms box and then click Next for moving forward.
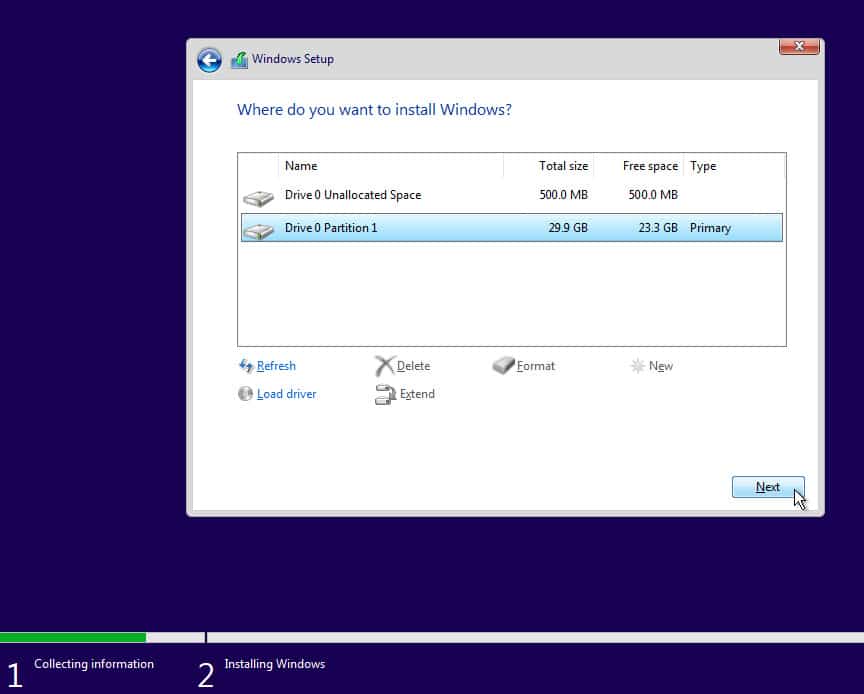
- Select a partition here in which TIny11 will be installed and then click next.
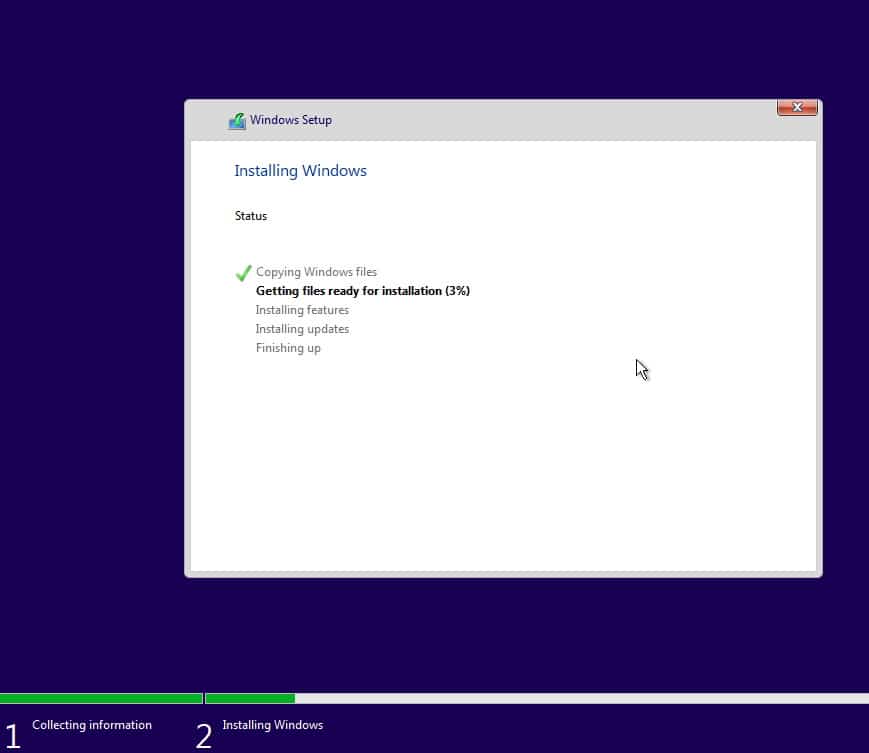
- Now sit back and relax while Tiny11 gets installed on your computer. It will take a couple of minutes and the installation time will depend on storage and flash drive speeds.
Also, your PC might restart a couple of times, which is a part of the process so don’t sweat it. - After that, you will get a welcome screen and the final setup wizard will open up.
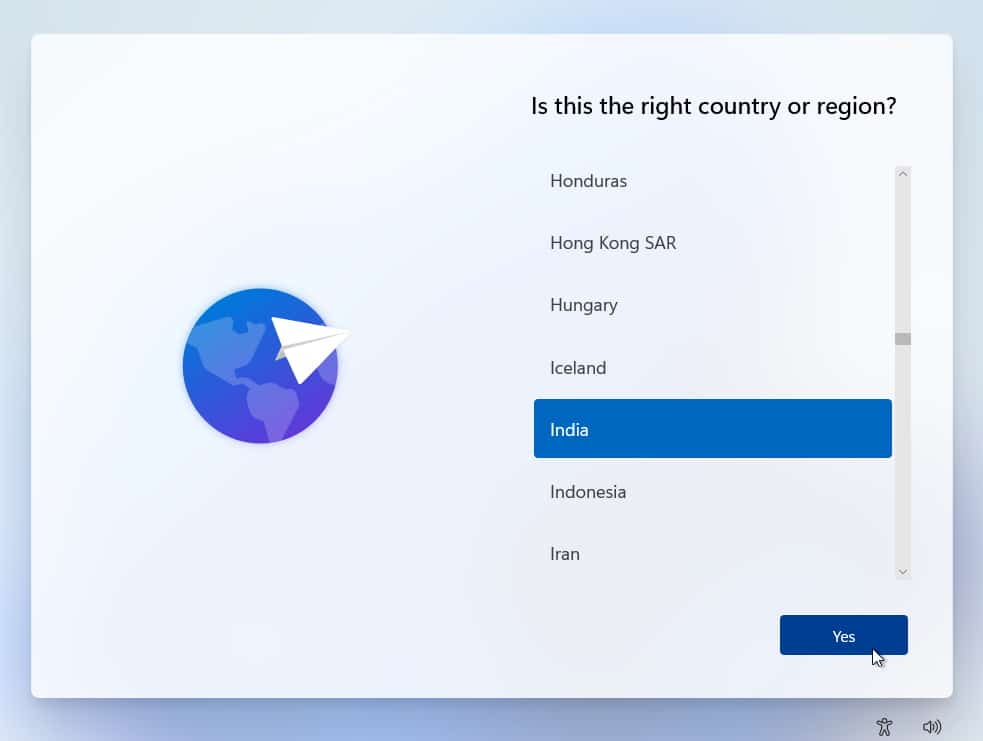
- Select your country on this page and click Yes. It is generally selected by default but you can manually change it if it is incorrect.
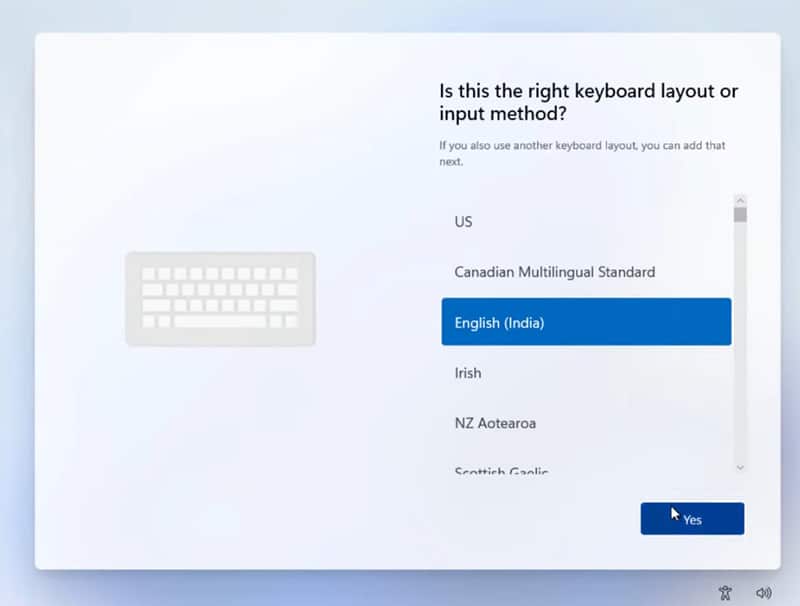
- In this section, select a keyboard layout, which is also preselected for you. Like the country selection, you can also change this option.
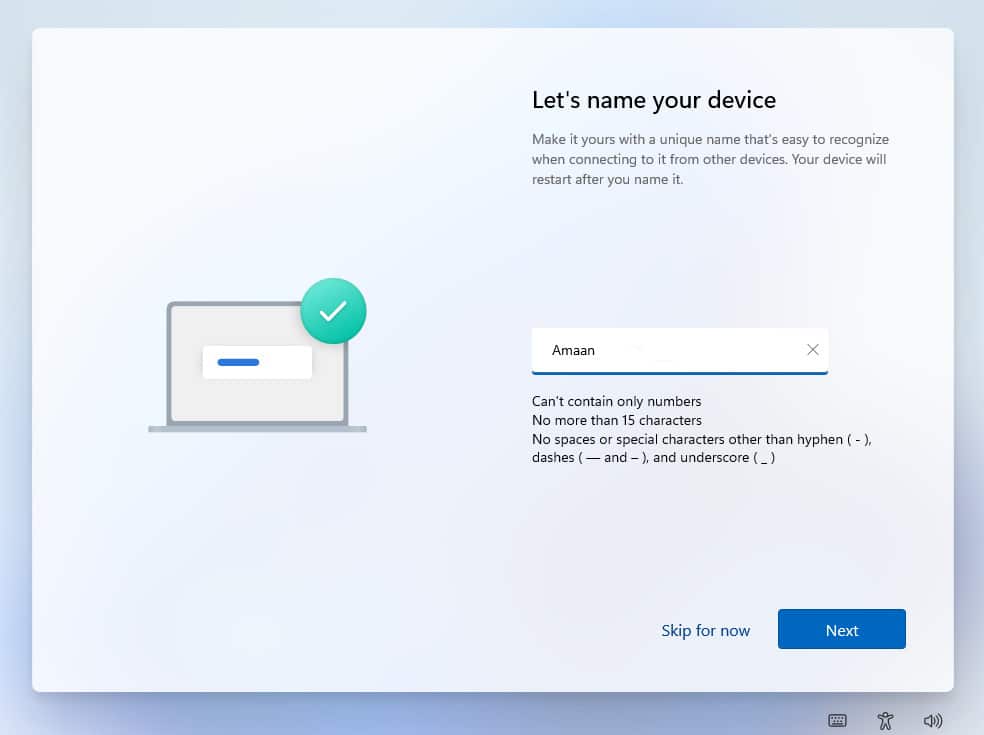
- Then give a name to your device here and click Next. It will appear on other devices on discoverable connections (LAN, Wi-Fi, Bluetooth, etc)
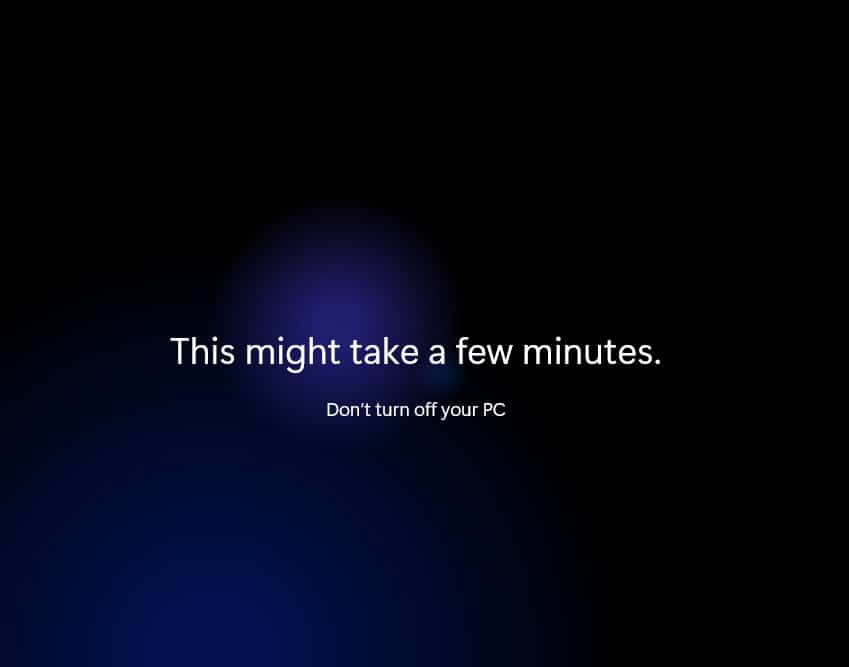
- Now wait for a couple of minutes for Tiny11 to make the final changes before bringing you to the desktop.
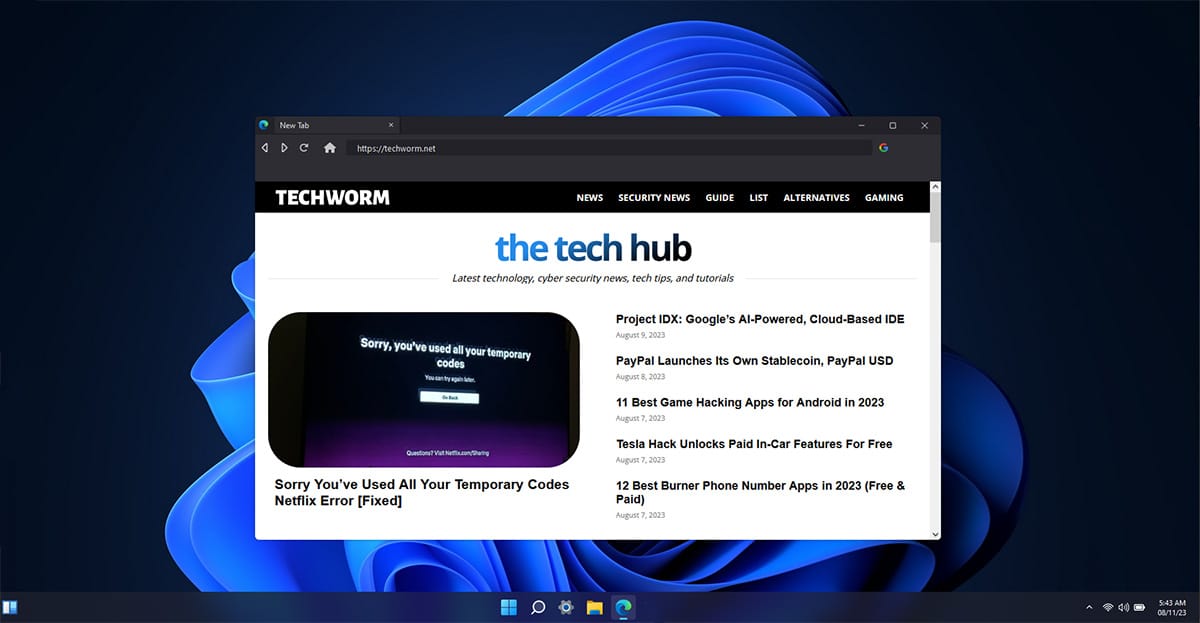
- Then you will land on the desktop and you have successfully installed Tiny11 on your computer. We installed Microsoft Edge to download other applications.
C. Getting Started with Tiny11 OS
As we know that Windows Tiny 11 has removed most irrelevant components to make it easier to run on most computers. It even includes the basics like the browser, media player, and more.
You can first get started by installing Google Chrome or Firefox. And then do the following to get the basic tools installed in one go.
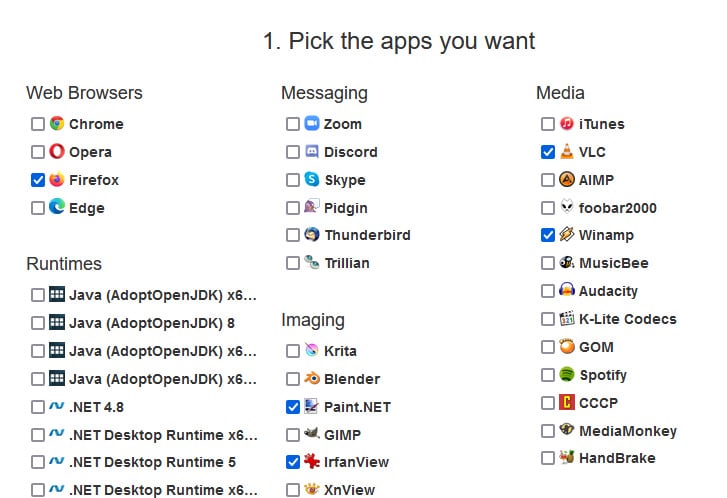
- Head to Ninite and select the applications that you want to be installed.
- Scroll down below the app select and download the Ninite installer through the Get Your Ninite button.
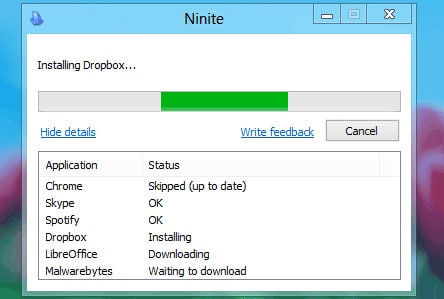
- Launch the installer and it will install your selected applications directly from the internet. It does by downloading them first and then installing them one by one.
You don’t have to download and install each application individually, saving you time and effort.
Components Removed in Tiny11 OS
Tiny11 manages to run on low-configuration PCs by removing certain components and services. You can install them individually later on if the need. They include the following apps and services.
- Microsoft Store
- Microsoft Teams
- Microsoft Edge
- OneDrive
- Cortana
- Xbox Identity Provider
- Microsoft Defender Antivirus
- Unnecessary background services
Frequently Asked Questions
You can download Tiny11 using the links posted by us in the earlier part of this article. We have also listed a link with different versions of the Tiny11.
Yes, Tiny11 only requires 2 GB of RAM and 8 GB of space. So it will run on 4 GB without any problem.
Tiny 11 is a basic version of Windows 11, which basically means that it has no extra features. You can download Tiny 11 for free and install it without any problem.
You can choose to receive the latest security updates and keep security threats at a minimum. It will suggest you to install major updates that will bring back all the components so choose accordingly.
We used Windows 11 Lite for a couple of days and did not encounter any viruses or malware.
However, a word of caution would be to NOT USE it for sensitive work where secret data of your work is involved. I would suggest you keep your banking work out of this operating system since its
Download Tiny11 Right Away
You can always download Tiny11 ISO but make sure to get the latest version available. The developer keeps on pushing out fresher versions with improved compatibility.
It is pretty stable and brings back your old PCs to life. You can also install it as a dual-boot with your primary OS, as a fun thing to play with.

